
The Surprising Truth About Tile Flooring And Cabinet Installation
Those who know me will confirm that small talk isn’t my forte, so let’s cut to the chase: it is a smart practice to tile the floor in areas prone to water damage, and it only makes sense to install tile wall-to-wall to completely seal the floor. Seemingly a no-brainer. Yet, the question of whether to install tile under or around built-in cabinets always comes up during construction.
Should tile be installed under or around cabinets?
My design philosophy is about making intentional choices based on specific priorities. I also believe that more effort up-front means better outcome in the long run.
The primary purpose of tile flooring in kitchens, bathrooms, and laundry rooms is waterproofing & cleanability. Installing tile around cabinets and leaving sections of the subfloor exposed defeats this purpose entirely.
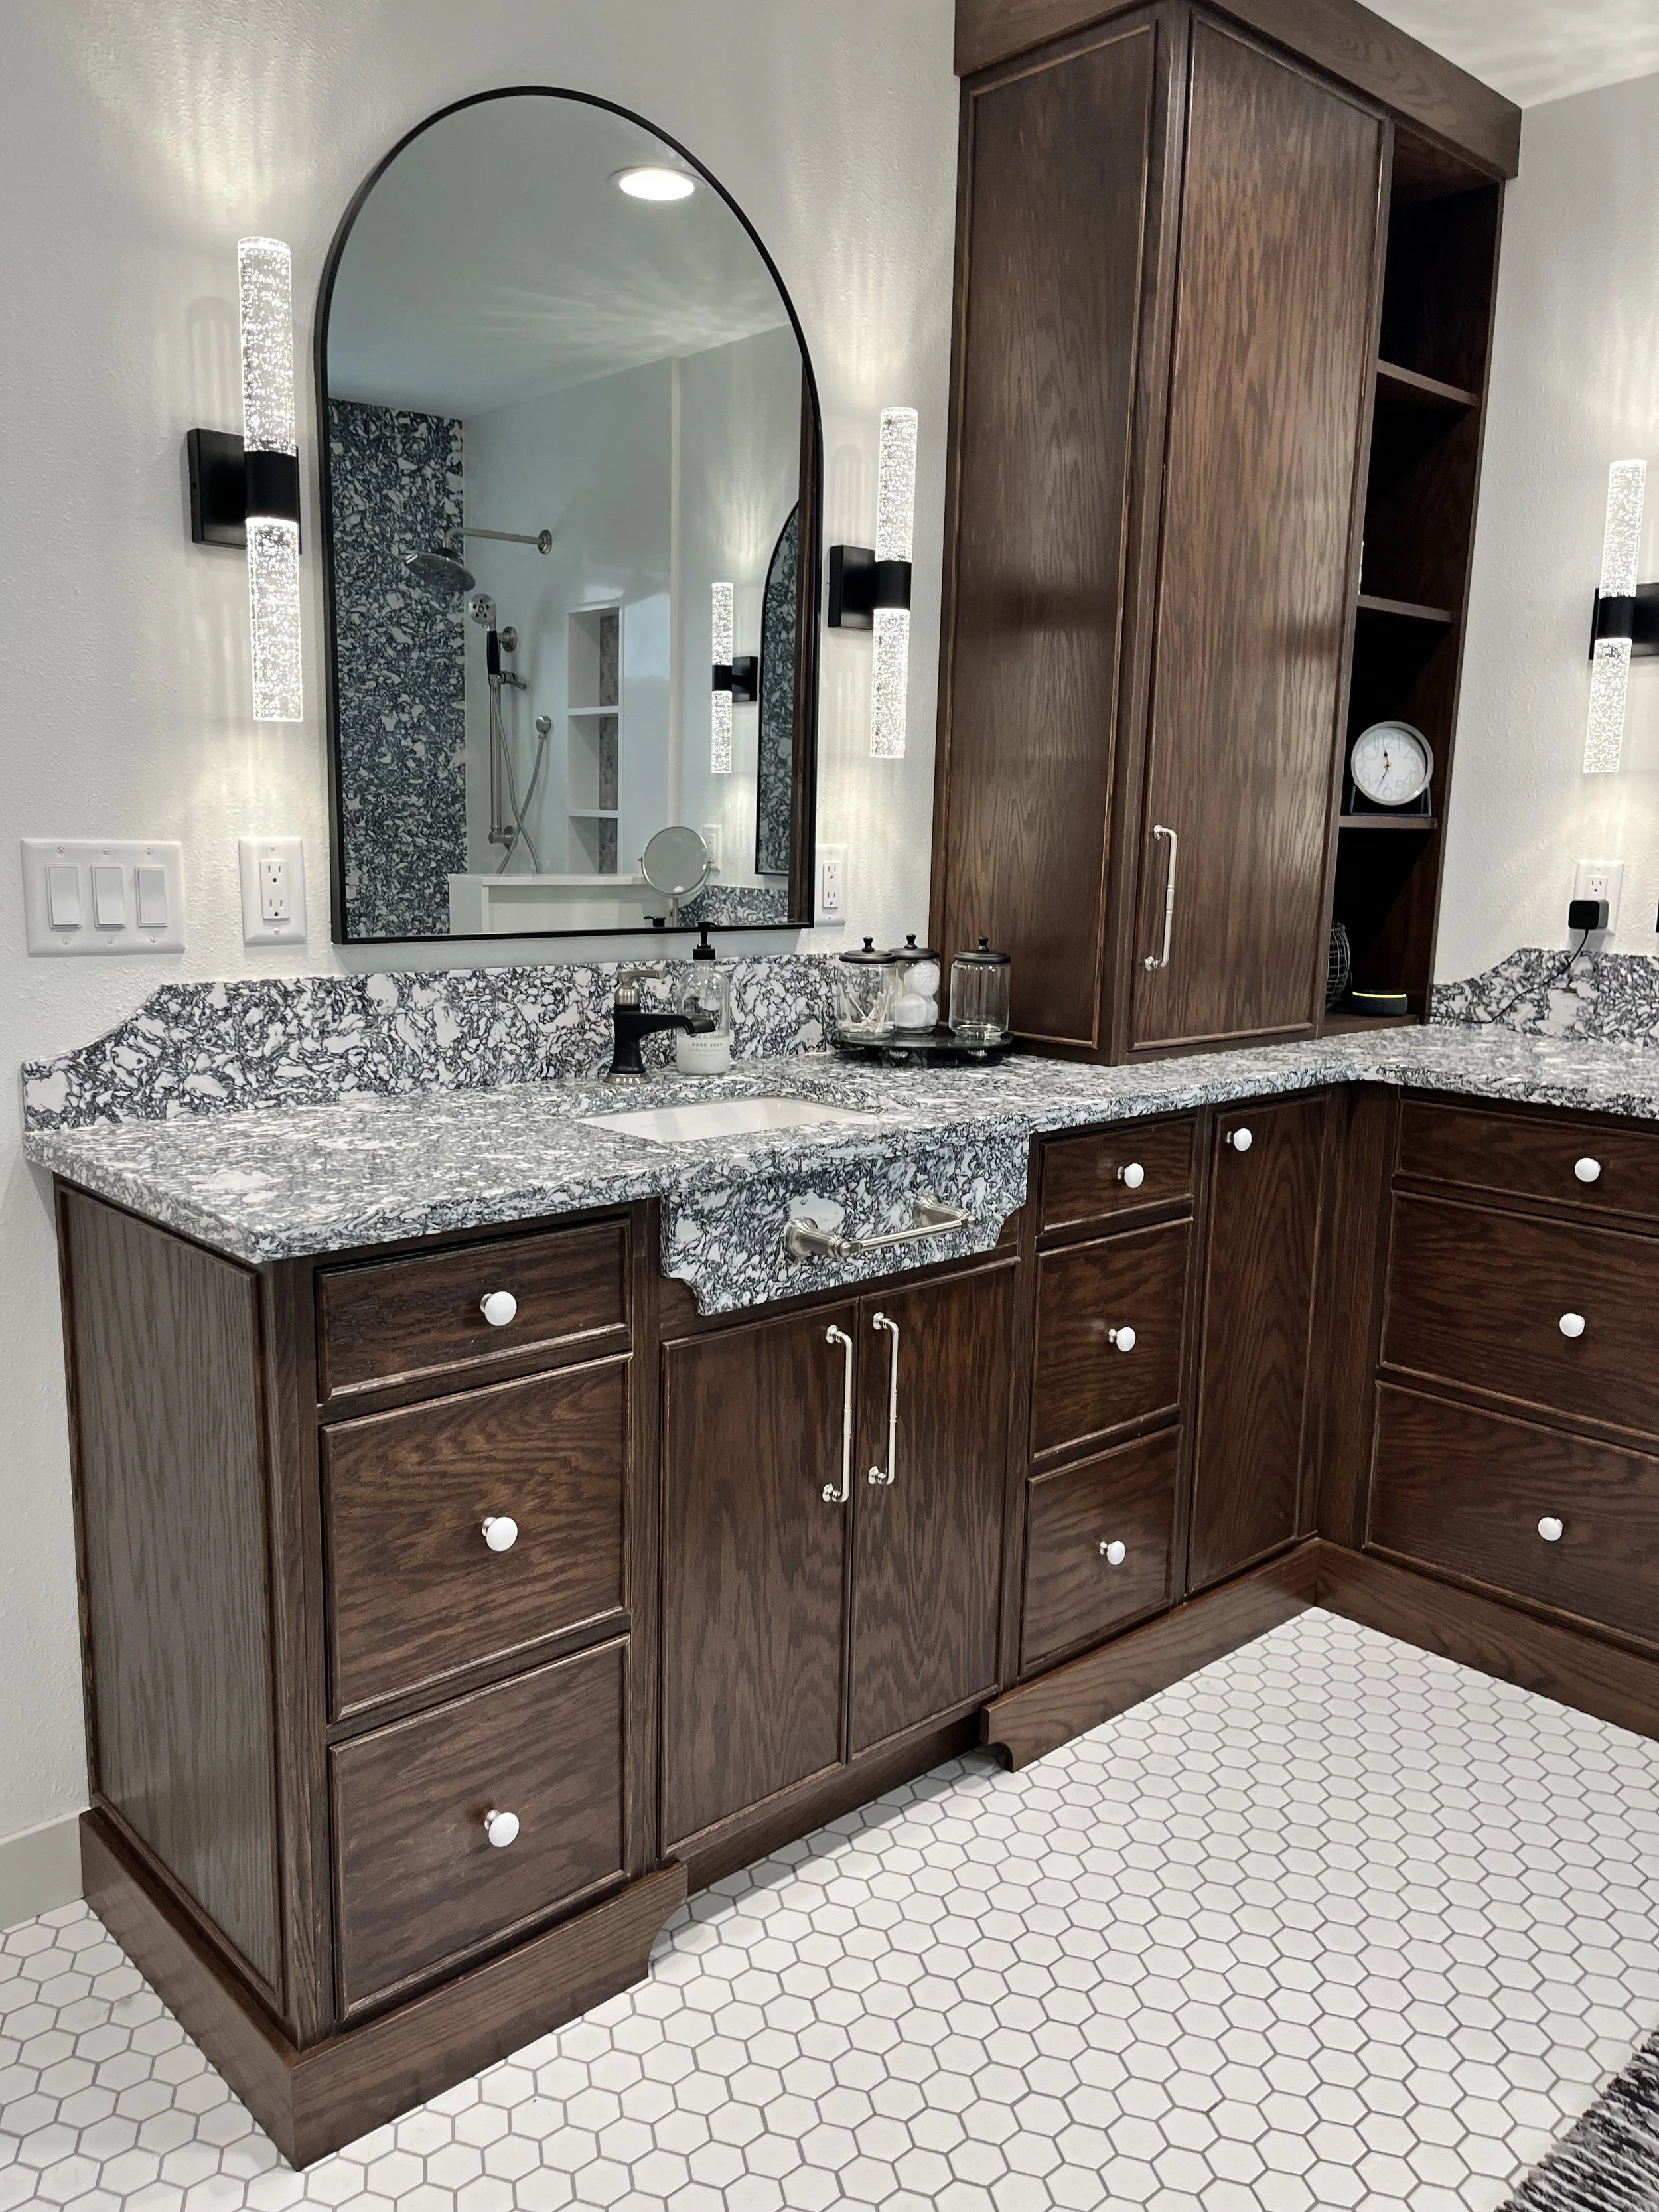
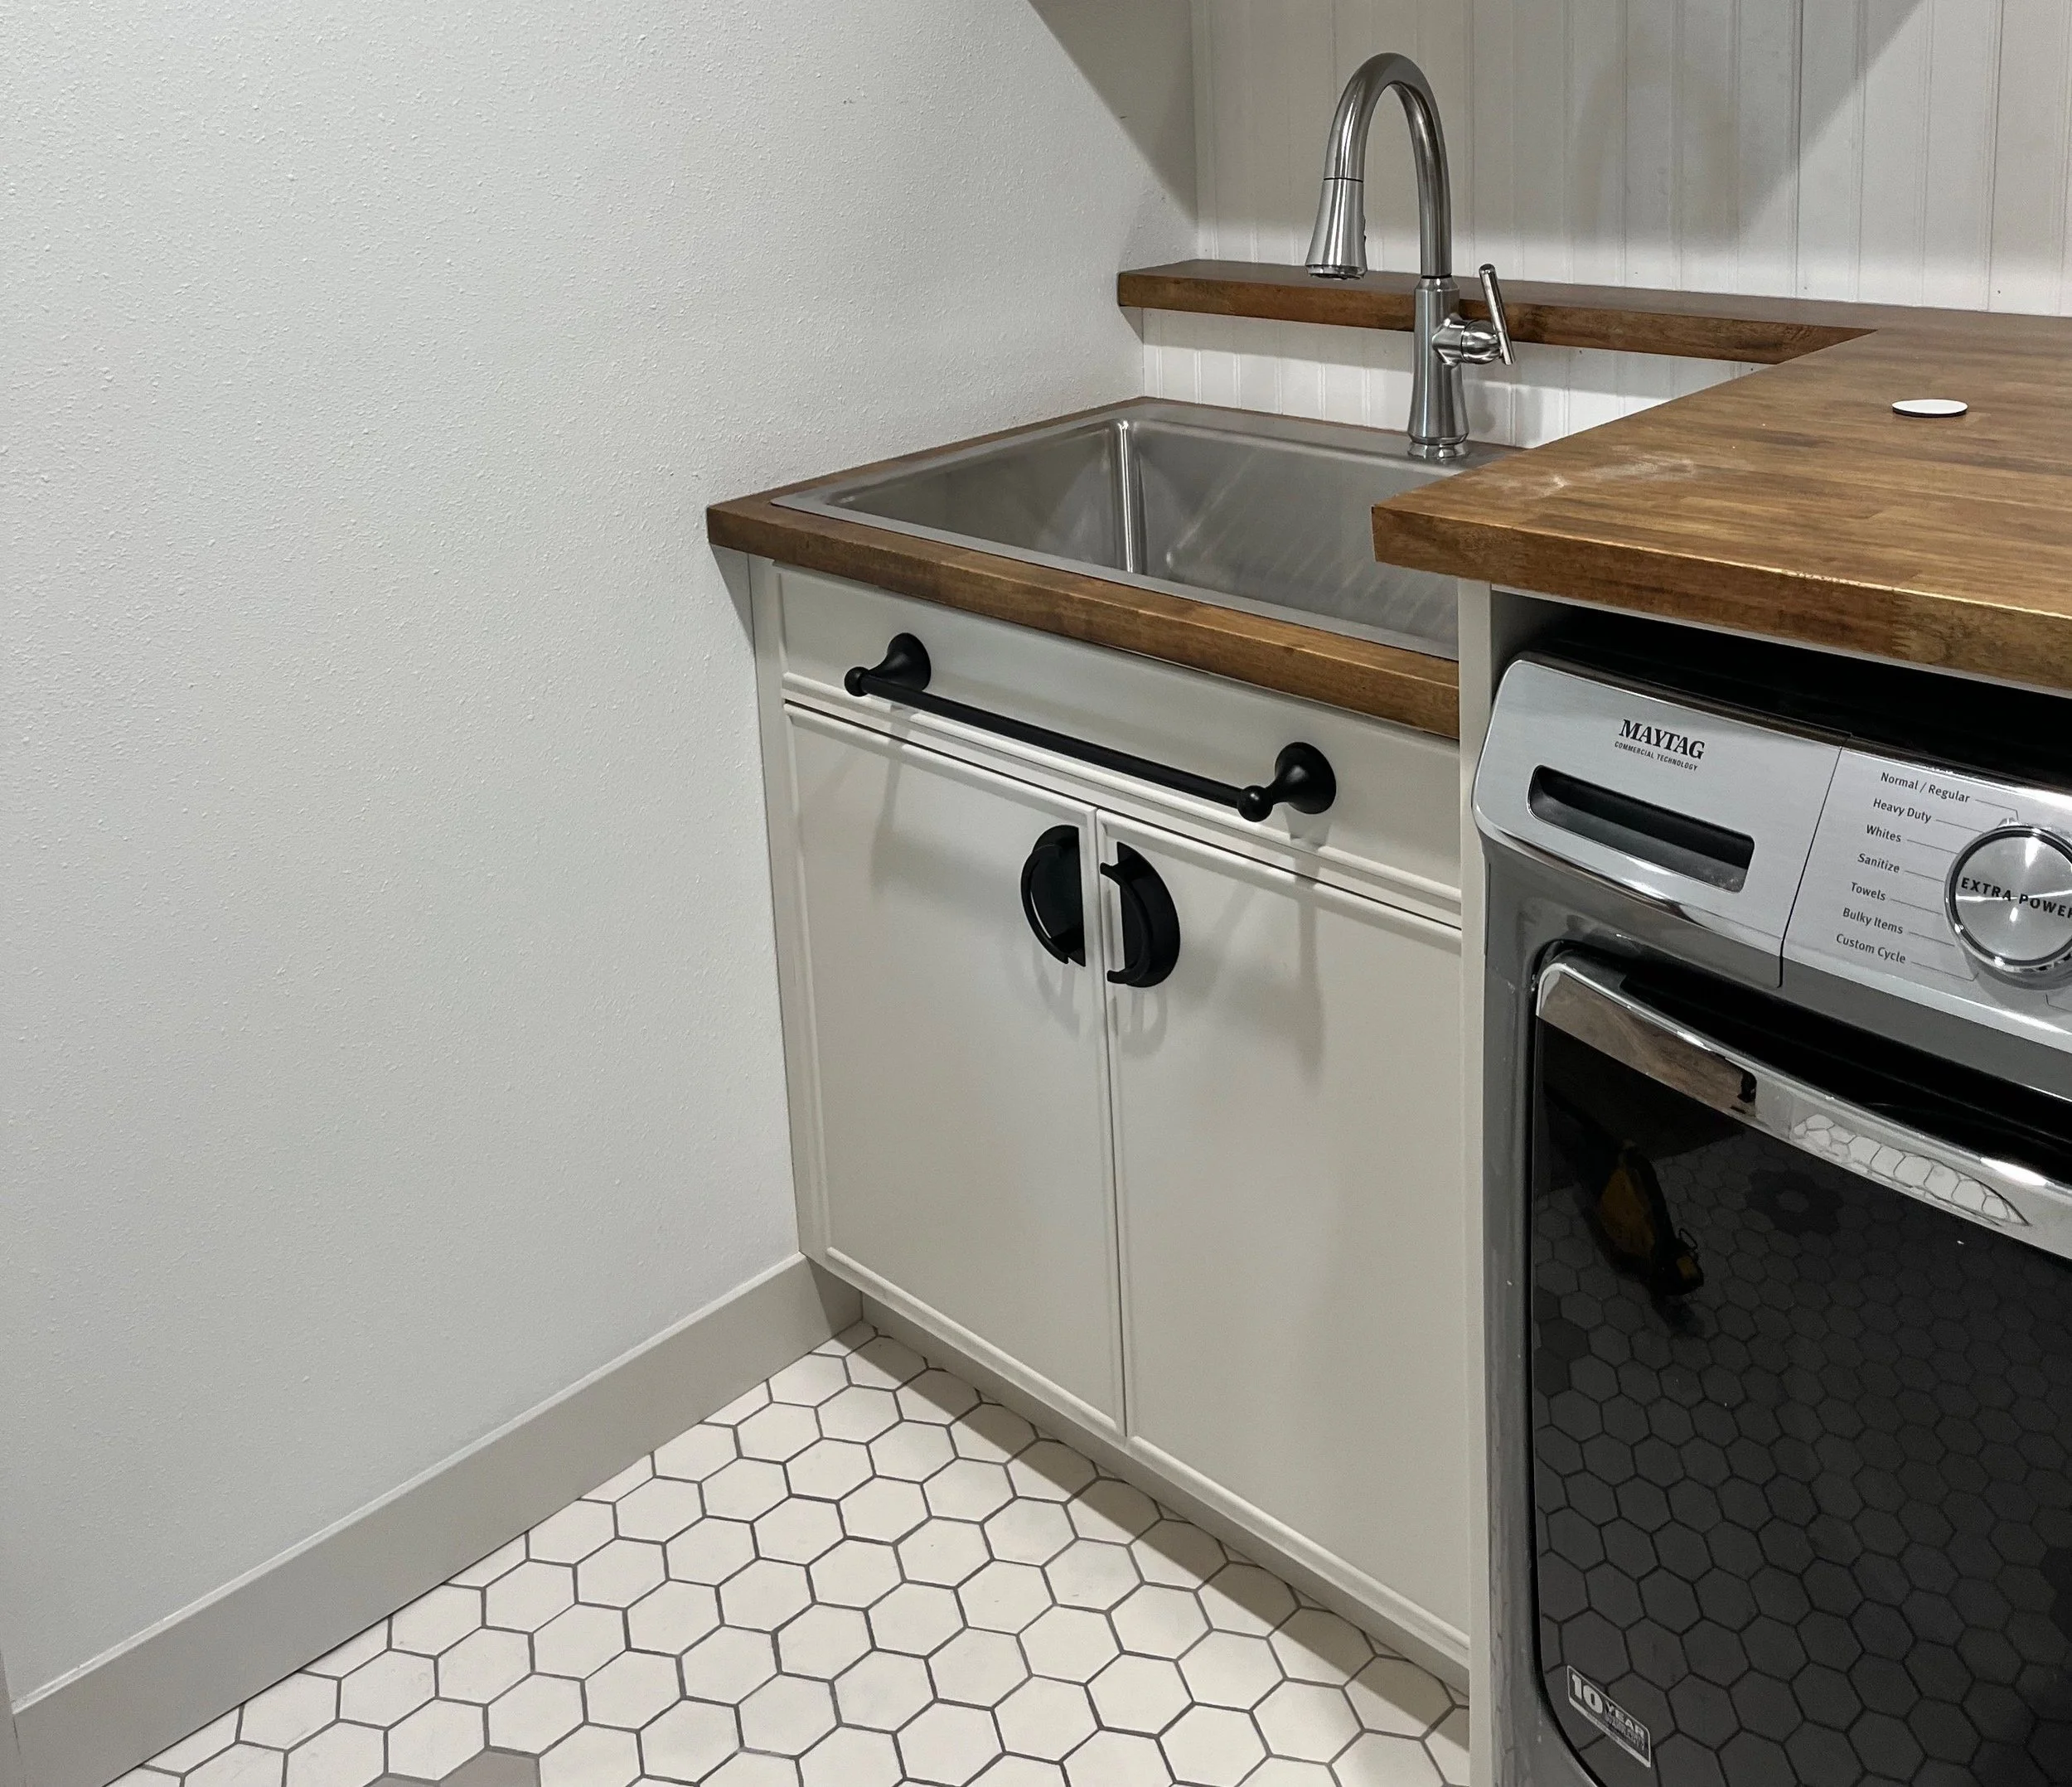
2” Hexagon floor tile installed wall-to-wall under the cabinets in this beautiful Primary Bathroom.
Why “Tile Around Cabinets” Is a False Economy
Some contractors swear it saves money and makes future flooring changes easier. In reality, it trades a small immediate saving for a laundry list of long-term headaches.
1. Exposed Subfloor Beneath Tile Leads to Serious Water Damage.
Here’s the reality: appliances and plumbing fixtures inevitably leak. It's not a matter of if, but when. And when that happens, your tile installation method will make a big difference in how much damage you'll be dealing with. Water from leaks will sneak under the tile edges, soaking into the subfloor and causing it to swell and buckle, pushing up against your beautiful tiles until they crack. Standing water will also cause more damage to the cabinets is they sit on a soaked subfloor.
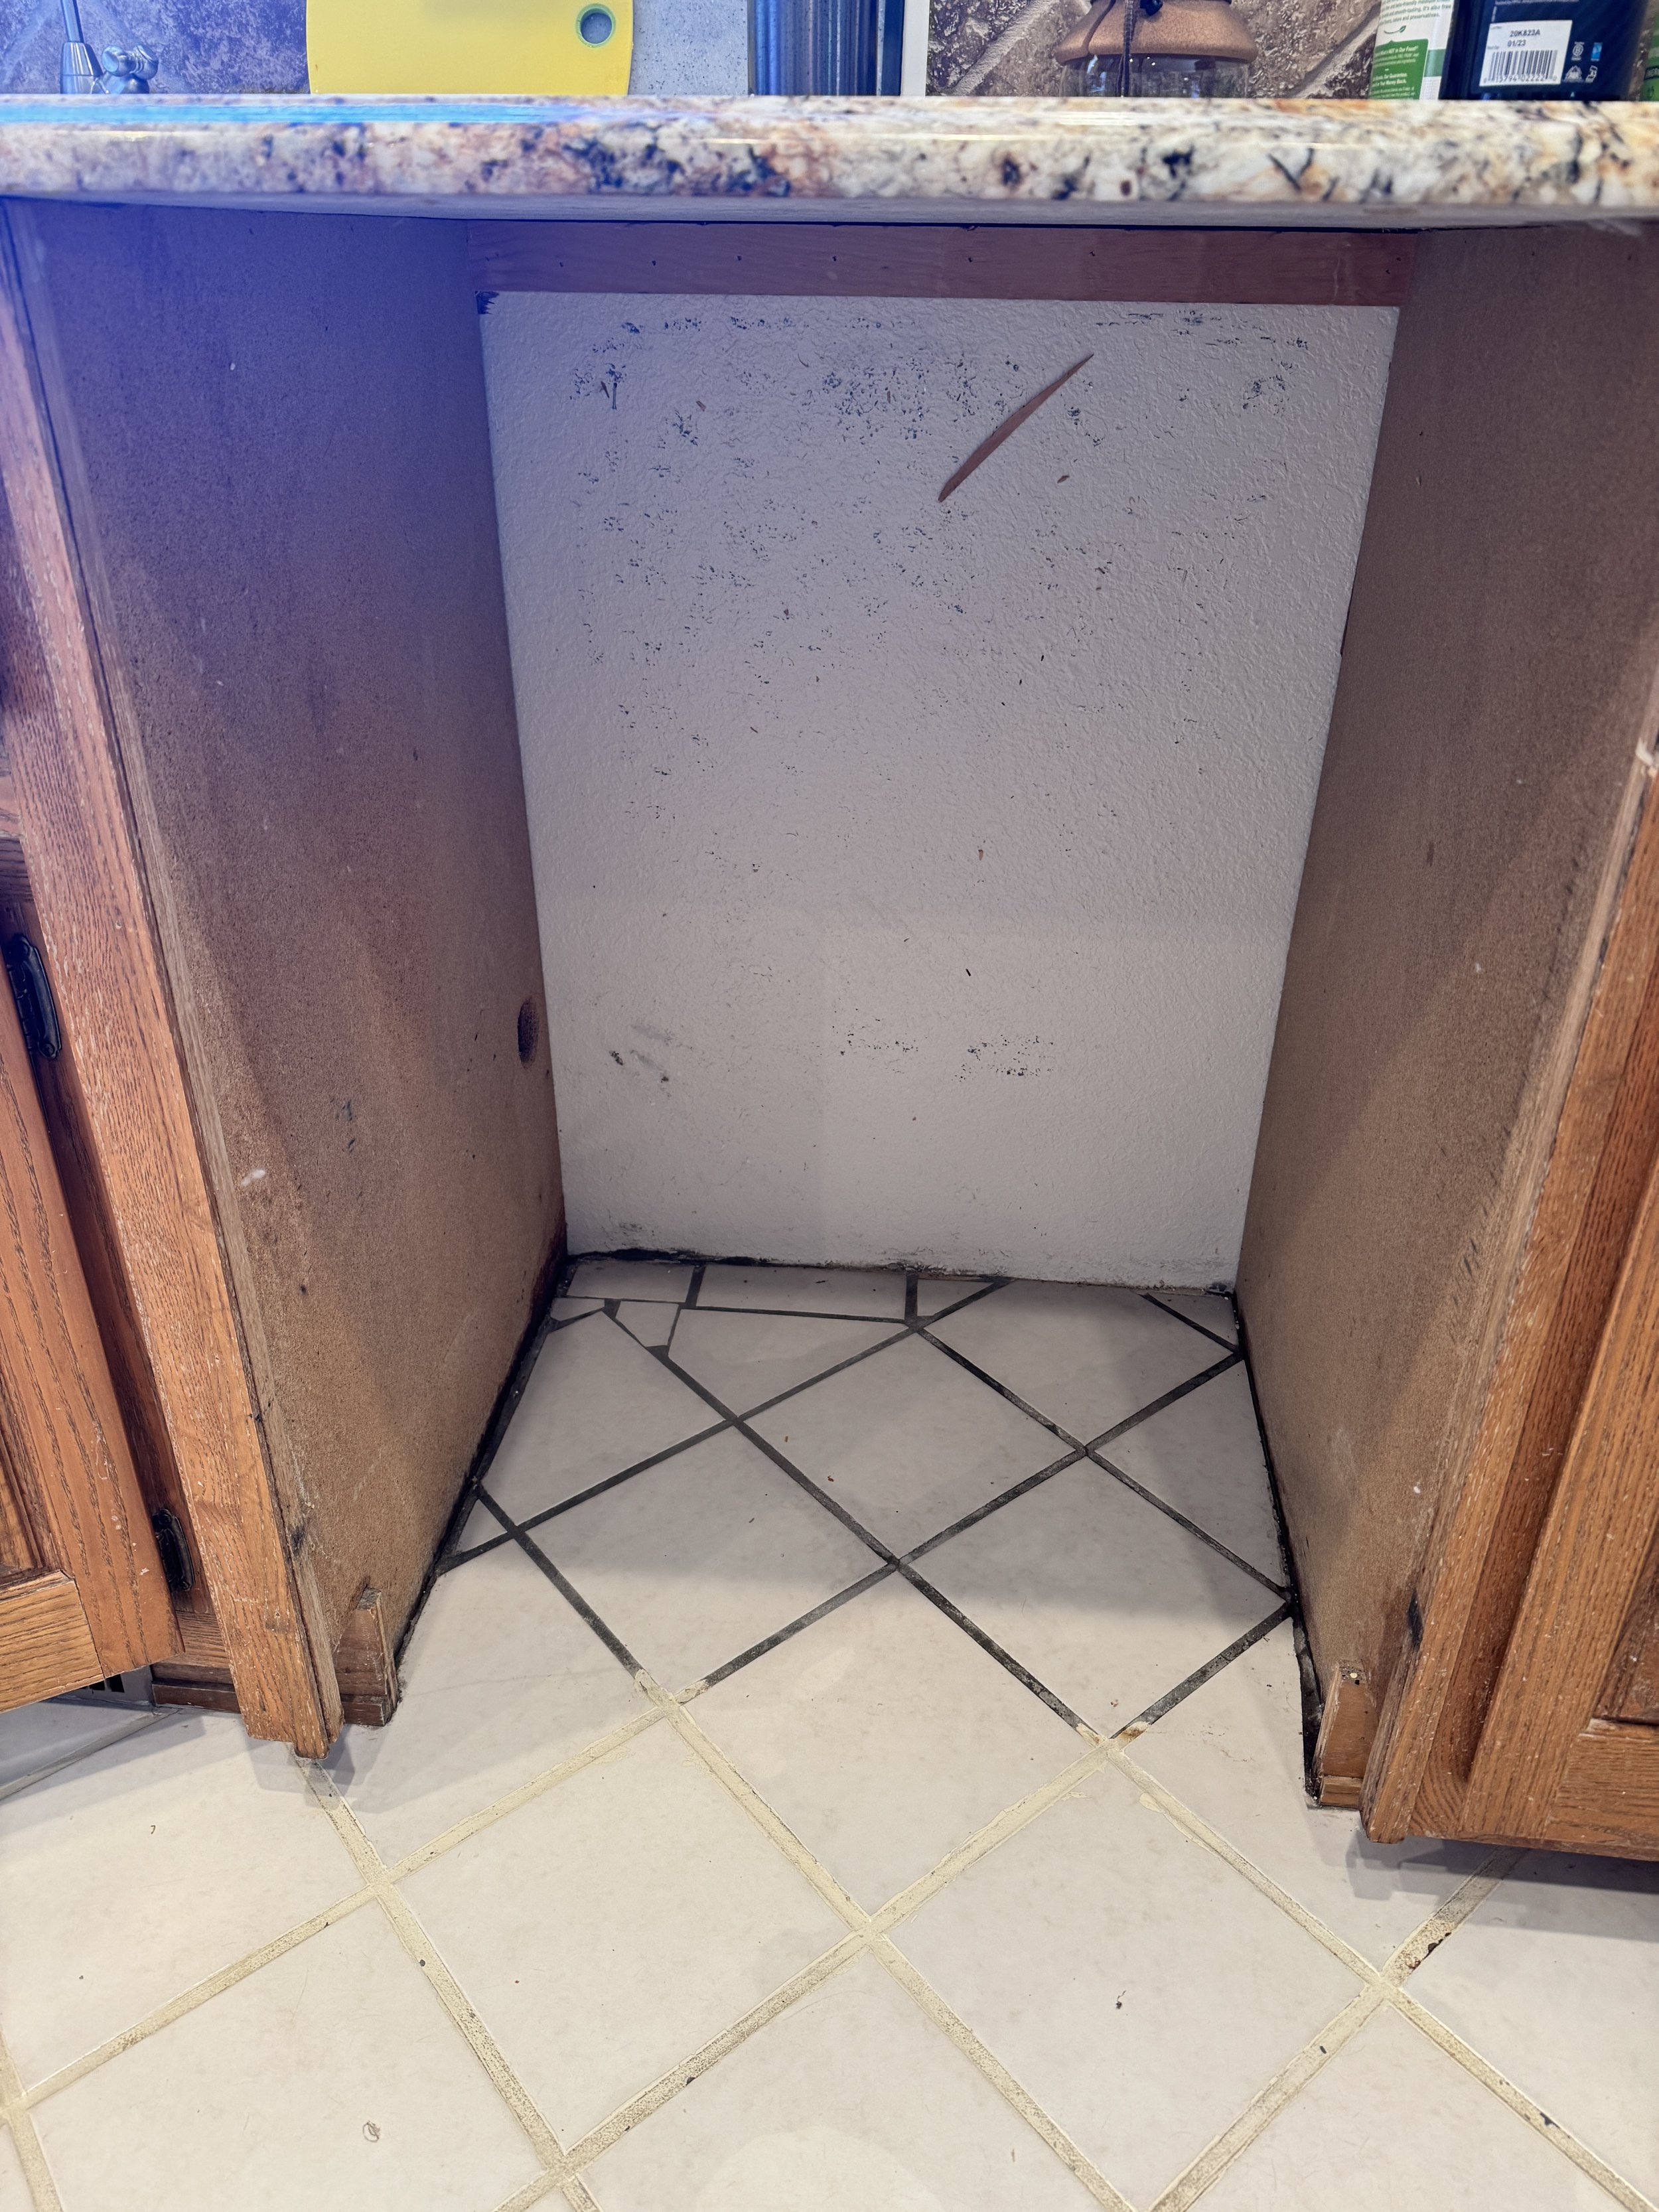
In this kitchen the floor was tiled around the cabinets and under the appliances only. When the dishwasher broke, the water ran under the cabinets and saturated the subfloor.
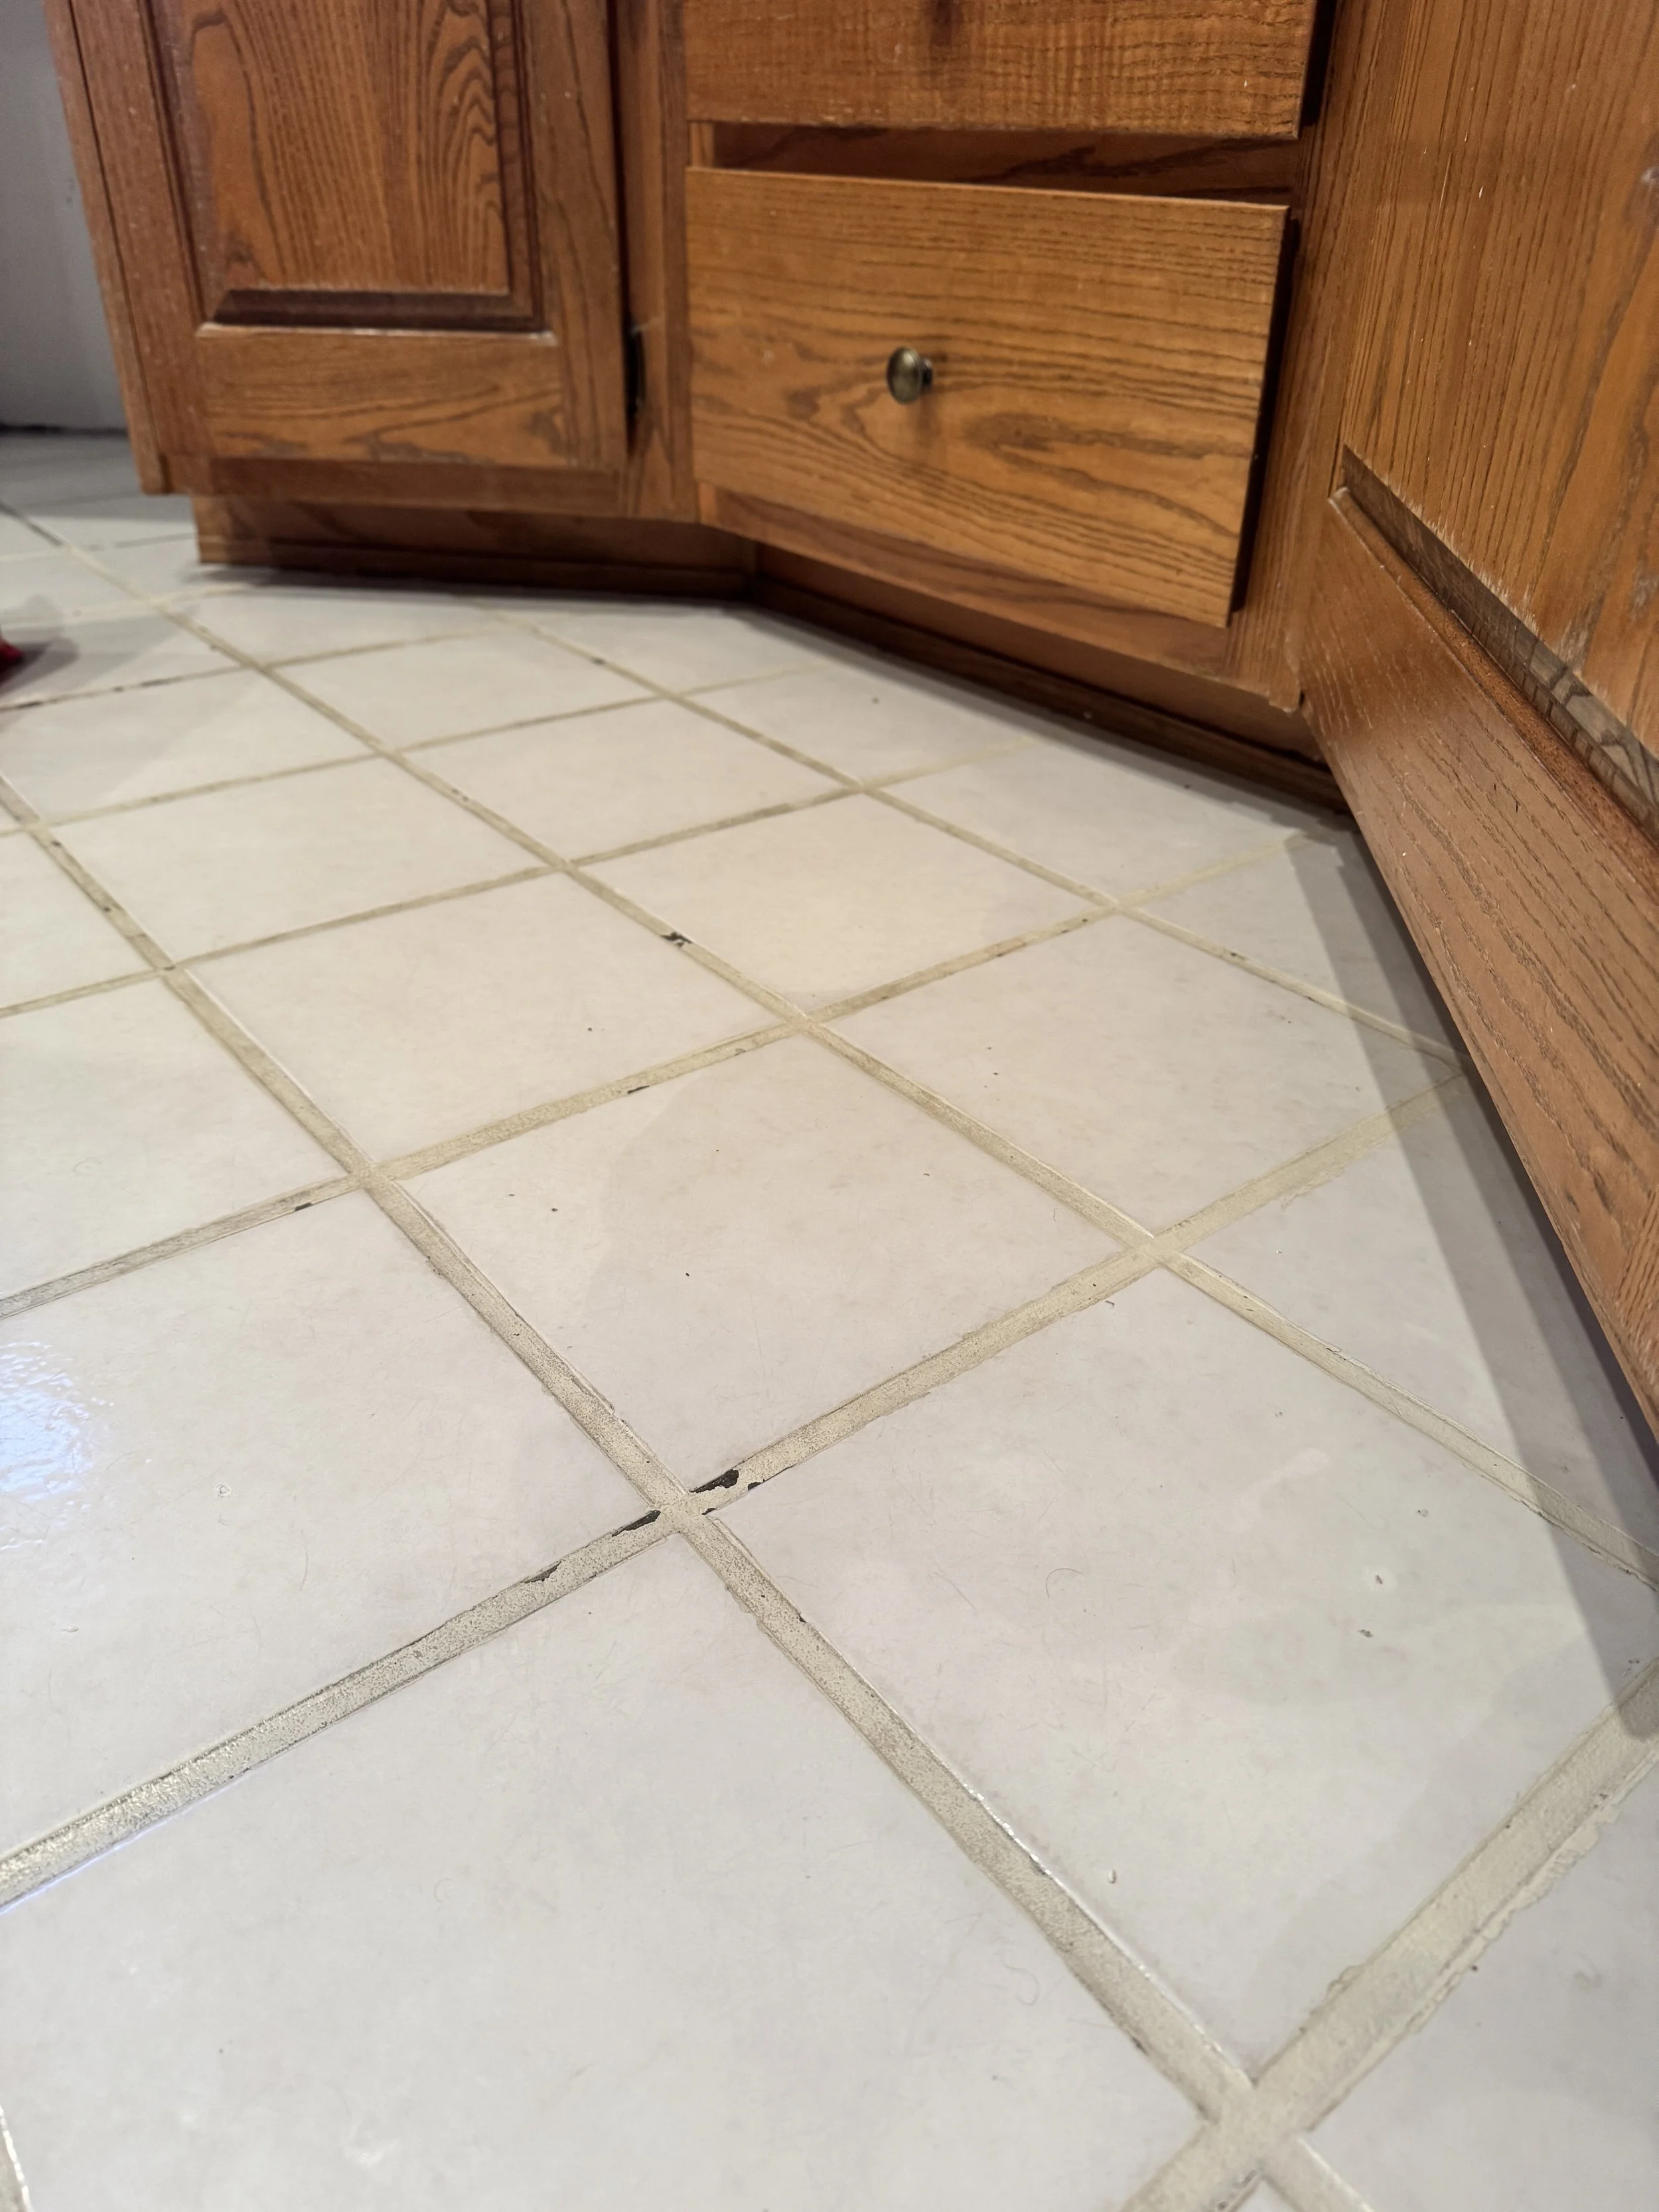
Notice the discoloration in the tile where the subfloor got wet.
2. Should you still tile wall-to-wall over a concrete slab?
You bet! Concrete is porous and unsealed in standard installs. It soaks up moisture, expands, and heaves tile just as easily as plywood.
3. Partial Tiling Lets Dirt and Food Accumulate Under Appliances.
Most large appliances ride slightly above the floor for air circulation. If they’re sitting on exposed subfloor, guess where every breadcrumb, dust bunny, and rogue Cheerio ends up? Hint: you won’t reach it with a broom.
4. Servicing appliances is more difficult when they stand on subfloor.
A tile “lip” at the cabinet edge creates a ridge the fridge or range must bump over. This turns service calls into gymnastics, and tile edge chips into an unpleasant reality.
5. Quarter-Round at Cabinet Toe-Kicks Signals a Shortcut Install.
Shoe moulding is contractor’s secret weapon. Installers often hide that perimeter tile cut and gaps with quarter-round. Functional, yes—elegant, not so much. Sometimes it is necessary, but when it can be avoided, I prefer a clean toe-kick reveal.
6. The Dishwasher may not fit under the countertop if the floor is tiled only under appliances.
Skip tiling under cabinets but tile under appliances and you may discover there’s no clearance left to slide the dishwasher beneath the countertop. This happens because dishwashers come in a standard height designed to match the height of base cabinets. And so, it is best to install both on an even surface to avoid shimming the countertop. Tiling under appliances only may seem like an economical solution, but if an appliance leaks, the water will run off the tiled area onto the subfloor around it.
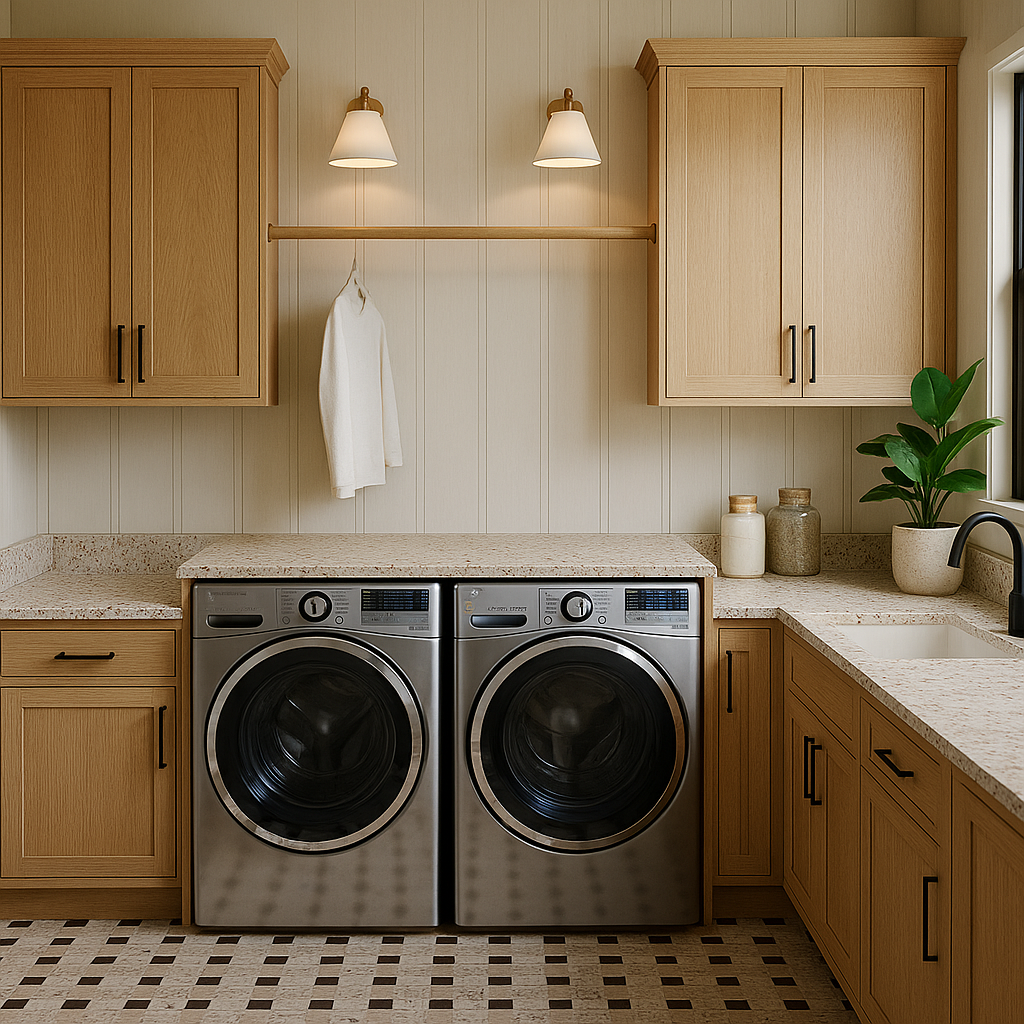
Laundry rooms are common places where water damage is likely to happen. I always recommend tiling these rooms wall to wall and even installing a floor drain to prevent a potential flood from spreading to adjacent areas.
The Proof Is In The Pudding.
I’ve seen this exact scenario with clients firsthand. In one case, during a previous renovation, tile was installed around kitchen cabinets, leaving parts of the subfloor exposed underneath. Predictably, the refrigerator’s ice-maker had an undetected leak. The homeowners suspected there was an issue only when the tile floor by the fridge got squishy. When the fridge was pulled out for service, its weight pushed against the swelled tile, and it all shattered. Adding insult to injury, their dishwasher leaked several months later. And despite the floor under the appliances being tiled, the water ran off to the sides under the cabinets and caused serious damage. I hate to say “I told you so” (okay, maybe I don’t hate it) — but a full-coverage tile install would have prevented the whole mess.
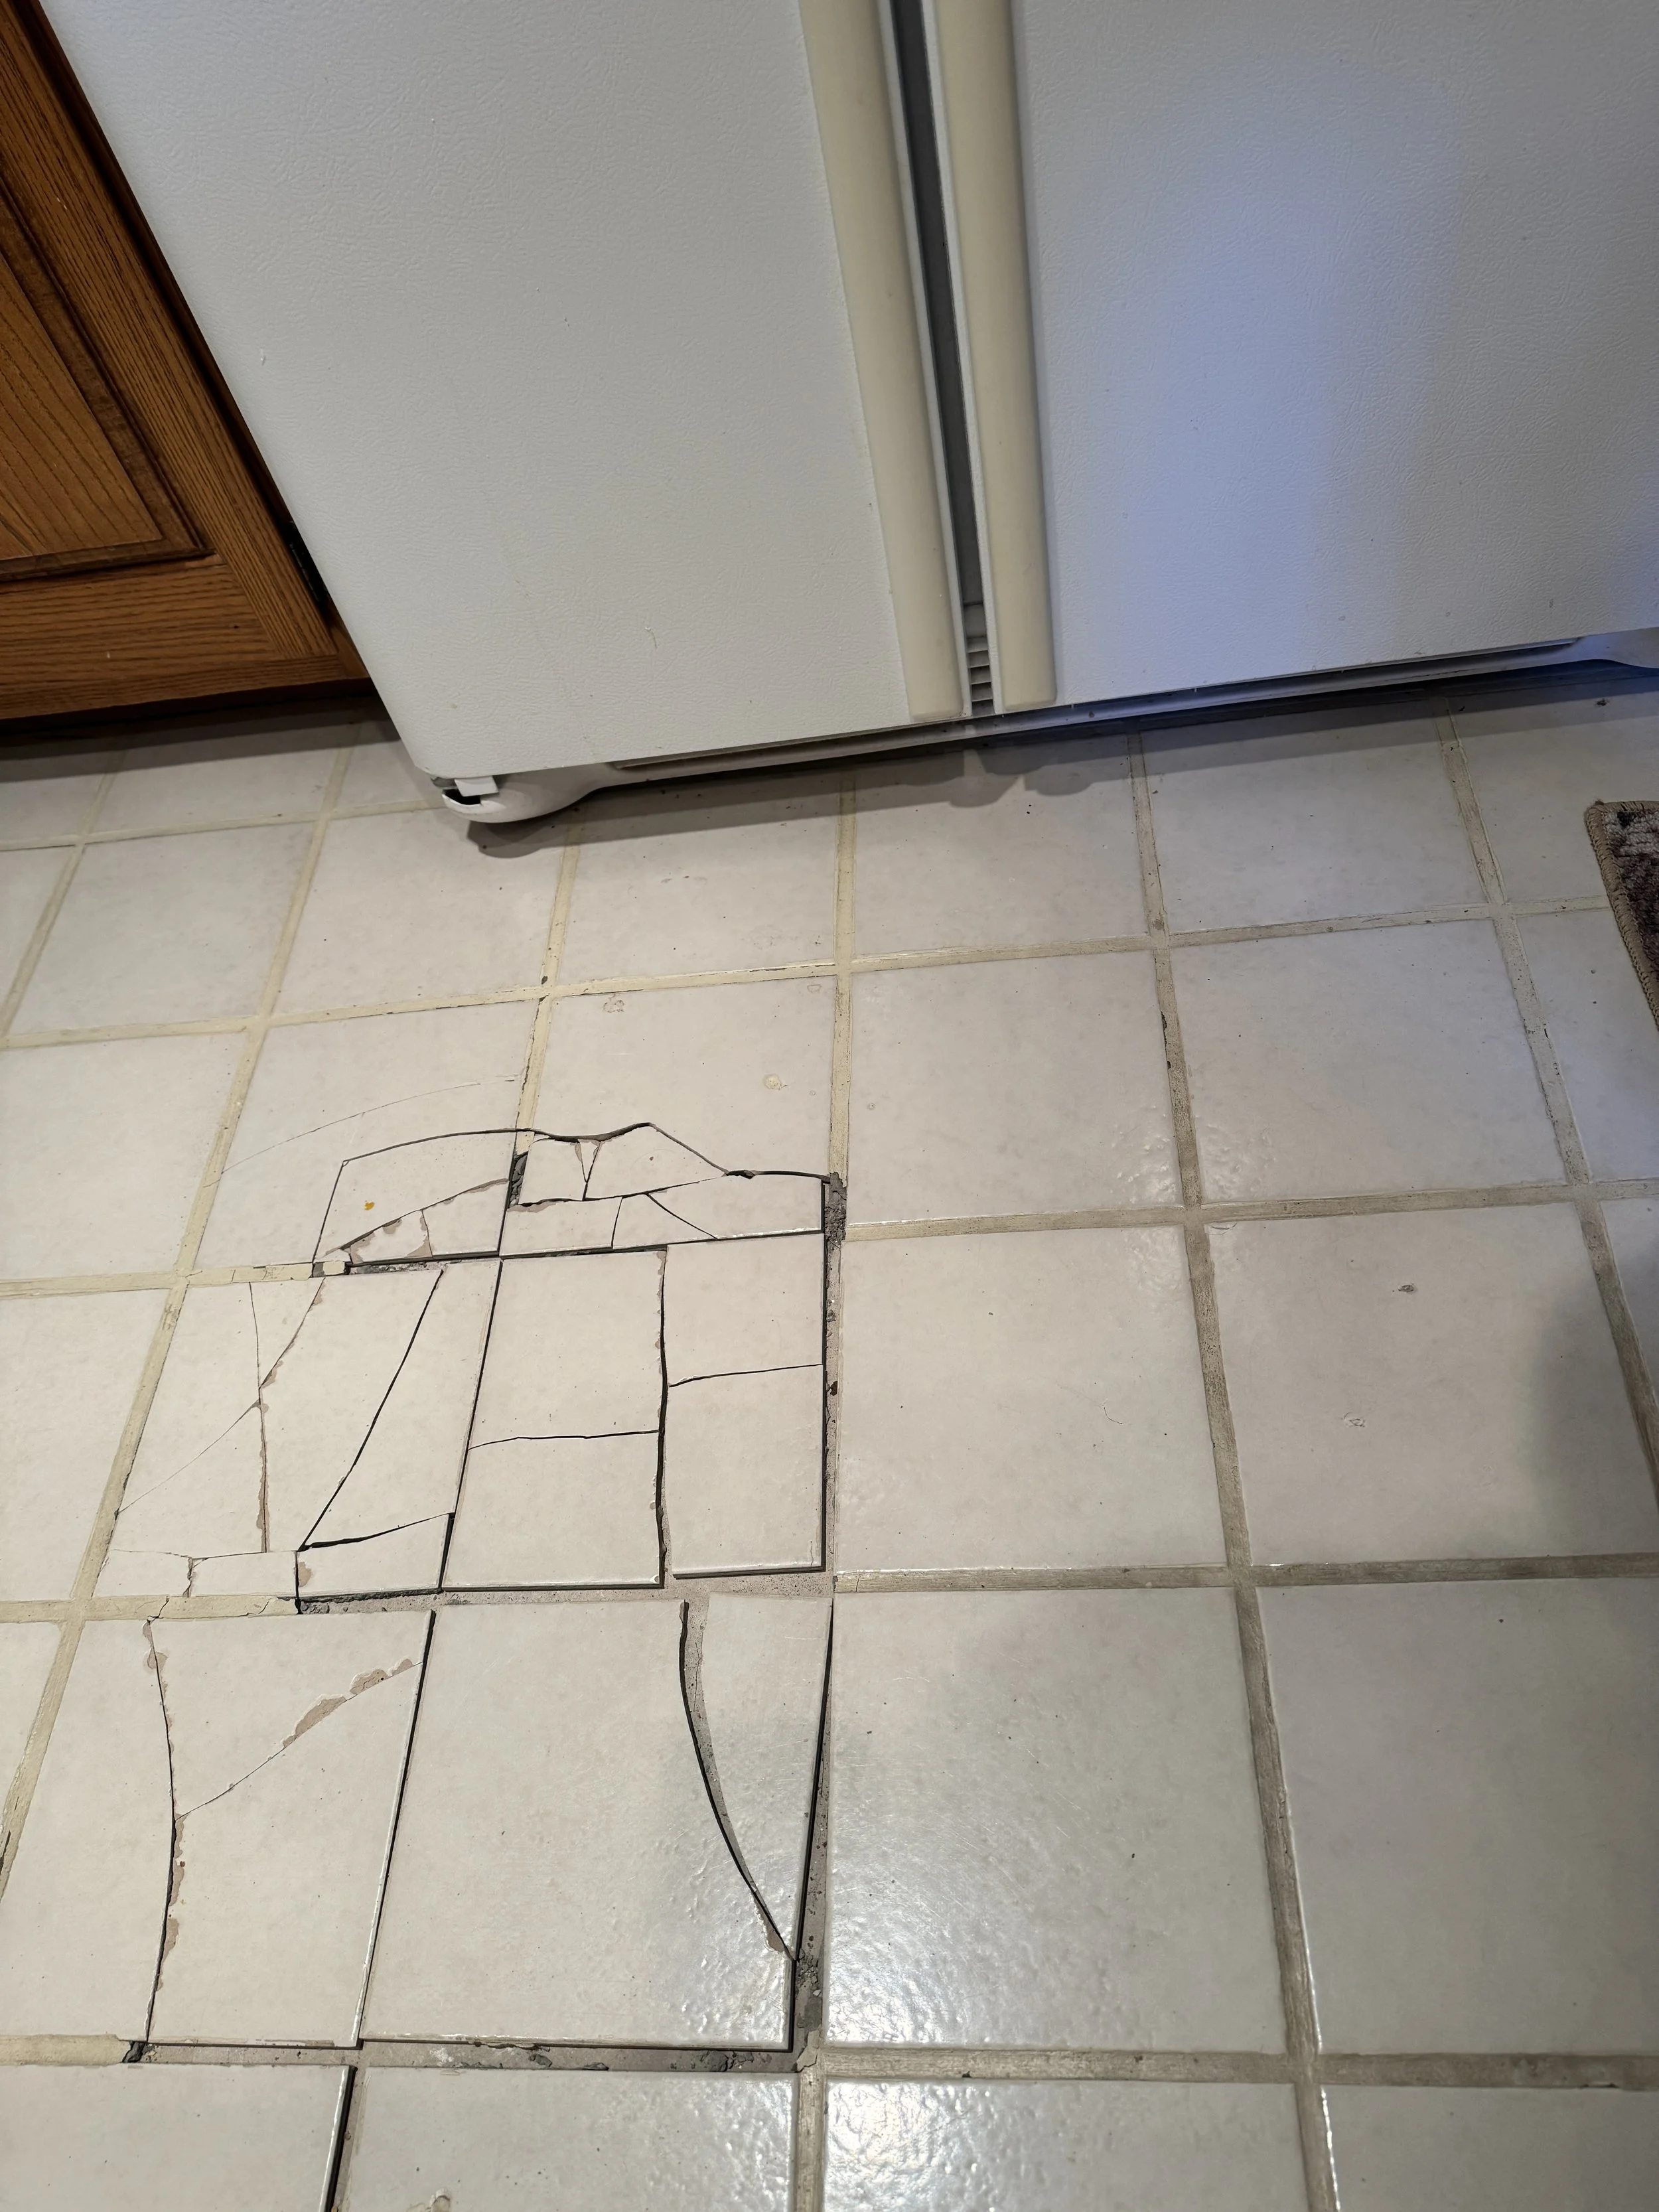
Here the water that leaked from the back of the fridge pooled to the low spot in the subfloor which destroyed the tile in front of the appliance. The full extent of the damage cannot be assessed without removing the tile.
As you can see, the incremental cost of tiling wall-to-wall is minor compared with:
Subfloor or slab mitigation after a leak
Mold remediation inside cabinets
Full tear-out and re-tile (bonus: washing dishes in the bathroom sink)
The moral of this story is: Choose a timeless tile, install it properly, and you will be likely to tire of your cabinets long before the floor needs replacing. 😜
That’s all, folks! Stay tuned for more tried and true design advice. And if you are feeling stuck with you project, or simply want to start it off on the right foot, book a Design Consultation with your friendly neighborhood designer (yes, that’s me).
Cheers to better design decisions!